If you’ve ever worked with precision tooling or complex metal parts, you know how frustrating it can be to thread a tiny, deep, or oddly shaped hole—especially when a standard tap just won’t cut it. That’s where Die Sinker EDM (Electrical Discharge Machining) comes in, and as a supplier of die sinker EDM machines, I’m here to walk you through how we make threads with this game-changing tech. No fancy jargon overload, just real, hands-on stuff I’ve picked up working with shops across the country for years. Die Sinker EDM
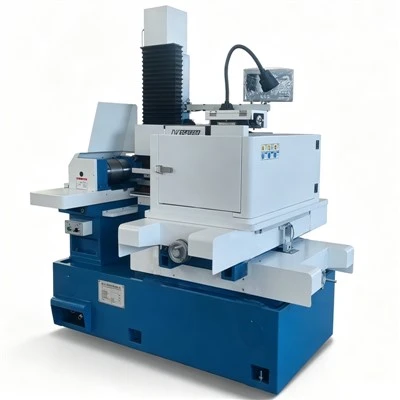
First off, let’s cut to what makes die sinker EDM different from, say, a manual tap or even a mill. Unlike cutting tools that physically “carve” material away, EDM uses controlled electrical sparks to erode metal. That means it can thread holes in super-hard materials—think titanium, tool steel, or Inconel—without wearing out a tap, and it fits in spots where a tap can’t reach, like deep blind holes or weird, angled cavities in a die or mold. I’ve seen shops struggle for weeks with a 0.8mm deep thread in a hardened steel mold core until they switched to EDM threads. Game over for that headache.
Now, let’s get into the actual process. I’m not going to bore you with a bunch of technical specs right off the bat—this is the stuff that actually works in the shop.
First step: Plan your thread and prep the part. Wait, EDM threads aren’t just pulling a trigger and letting it go. You need a custom electrode, right? That’s the key part here. We talk to every customer who buys our machines to make sure they get the right electrode setup, so I’ll explain that clearly. The electrode is usually made of copper or graphite—graphite is cheaper for roughing, copper gives cleaner finishes for finishing passes. For threads, the electrode isn’t just a rod; it’s shaped like the negative of your thread. So if you want a 6mm x 1.0mm internal thread, the electrode has ridges that match the gap between the thread grooves on your part.
Prepping the part is simple but important. You’ve got to clamp it securely—no movement, even a tiny shift will mess up the thread. And you need to drill a pilot hole first. That hole’s size isn’t random—it’s the minor diameter of your thread. For that same 6mm x 1.0mm thread, the pilot hole would be about 5mm, give or take a little depending on the material. I always tell customers to double-check their thread tables here; too small a hole and the electrode will burn too much metal, too big and you’ll get a loose thread.
Next up: Set up the EDM machine. This is where having a good die sinker EDM makes all the difference. Our machines have intuitive controls that walk you through the setup, but even if you’re using a different brand, the basics are the same. First, you load the electrode into the spindle and the part onto the worktable, then you align them. Alignment is huge—if the electrode is even a tenth of a millimeter off center, your thread will be lopsided. Most modern EDMs have automated alignment now, which is a lifesaver. I remember when we had to use dial indicators to line stuff up—what a waste of time.
Then you program the thread path. Wait, EDM makes threads in two ways, usually: full profile threading or incremental threading. Full profile means the electrode is the exact shape of the entire thread, so it plunges all the way into the pilot hole and erodes the thread in one go. That’s fast for smaller threads, like M3 to M10. Incremental is when you plunge the electrode a little, then pull it up and move it around the hole, repeating until you get the full thread depth. That’s better for deeper threads or threads in harder materials, because it gives you more control over spark intensity.
You’ve also got to set the EDM parameters, and this is where experience matters. Roughing passes use higher current and longer spark times to remove metal fast—you don’t care about a perfect finish here, just getting the thread shape started. Finishing passes lower the current, shorten the spark time, and even adjust the spark gap to make the thread smooth and the right size. If you set the roughing current too high, you’ll end up with burrs or a thread that’s too big, and finishing too low will add hours to your cycle time. Our team at the supplier side always gives custom parameter sheets for different materials and thread sizes, so customers don’t have to guess.
Wait, don’t forget the dielectric fluid! EDM uses a liquid (usually deionized water or oil) to flush away the eroded metal debris (called “swarf”) and cool the electrode and part. If the fluid isn’t flowing right, the swarf will get trapped between the electrode and part, causing stray sparks that mess up the thread—even cause a short circuit that stops the machine. I’ve seen shops skip checking the fluid flow and ruin an expensive electrode and part in 10 minutes. So make sure the flushing holes in the electrode are aligned right, and the dielectric is circulating properly. It’s a small step, but it’s one of the most common mistakes new EDM users make.
Once everything is set, hit run. Now, here’s the thing about EDM threads: you can’t just stop mid-cycle. The process is continuous from start to finish, usually taking a few minutes to an hour depending on the thread size and material. When it’s done, you need to clean the part. The dielectric has swarf in it, so soak the part in a solvent or ultrasonic cleaner to get rid of any leftover debris, otherwise you’ll think the thread is messed up when it’s just leftover gunk.
Now, let’s talk about the pros and cons, because no process is perfect. Pros first: EDM threads can go deeper than standard taps—like, way deeper. I’ve seen threads 50mm deep in a 1mm diameter hole that would snap a tap instantly. And since it’s a “no-contact” process, there’s no tool wear on the part, so threads stay consistent even if you make 1000 parts. It also works on any conductive material, no matter how hard—we had a customer thread a part made of hardened steel that was 62 HRC, which is almost impossible to tap without breaking tools.
Cons? It’s slower than tapping for small, shallow threads. If you need a bunch of M5 threads in mild steel, tapping is way faster than EDM. And the electrode has to be made specifically for each thread size and pitch, so there’s a little upfront cost for tooling. But for high-precision, deep, or hard material threads, that tradeoff is totally worth it. I also hear people say EDM threads are not as strong as tapped threads, but that’s only if you set the parameters wrong. When done right, EDM threads have the same tensile strength as the parent material.
A few pro tips I’ve picked up over the years, stuff we share with every customer who buys our die sinker EDMs. First, use graphite electrodes for roughing and copper for finishing. Graphite is cheap, easy to machine into complex shapes, and wears slower during roughing passes. Copper gives a smoother finish, so you don’t need as many finishing passes. Second, don’t skip the electrode inspection. Check for chips or burrs on the electrode before you use it—even a tiny burr will ruin your thread. Third, use thread gauges to check the finished thread. It’s easy to think it’s right, but gauges will tell you if the pitch is right or if the thread is too tight/loose. Fourth, if you’re making multiple parts, use a consistent setup. Don’t move the worktable or re-align the electrode every part—use fixtures to make the process repeatable, so every thread is the same.
I should also mention when you should actually use EDM threads vs. other methods. If your thread is in a blind hole that’s deeper than 3x the diameter, EDM is a no-brainer. If the material is harder than 45 HRC, tapping is going to snap, so EDM is better. If the thread is in a weird shape, like a slanted hole or a hole inside a cavity, you can’t reach with a tap or mill, EDM is your answer. Tapping is great for small, shallow, easy-to-reach threads in soft materials, but EDM is the workhorse for the tricky stuff.
As a die sinker EDM supplier, I see shops make the same mistakes over and over when they first switch to EDM threads. They skip aligning the electrode, they use the wrong electrode material, they don’t check the fluid flow. That’s why we offer free setup training for every customer who buys our machines—we don’t just sell you a machine and disappear. Our team knows that getting the thread right is what makes or breaks a shop’s production, so we’re here to walk you through every step, from programming to parameter settings to troubleshooting.
If you’re dealing with threads that are giving you headaches—whether they’re too deep, too hard, or in a spot no tool can reach—die sinker EDM is definitely worth checking out. It’s not as scary as it sounds; once you get the setup down, it’s a reliable process that delivers consistent, high-quality threads every time.
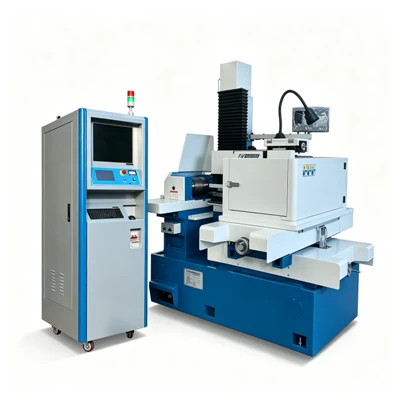
At the end of the day, EDM is all about precision, and threads are one of the most important precision features in any part. If you’re ready to stop fighting with broken taps, lopsided threads, and impossible-to-reach holes, it’s time to talk to someone who knows die sinker EDM inside and out. We’re here to answer your questions, help you figure out the best setup for your parts, and make sure you get the results you need. Don’t waste another week struggling with threads that should be easy—reach out to us today to chat about your needs and how our die sinker EDM machines can help.
ZNC Die Sinker EDM References:
- EDM Handbook, National Tooling and Machining Association, 2021
- Die Sinker EDM Process Parameters Guide, Electrical Discharge Machining Society, 2022
- Internal Threading with EDM: Best Practices, Manufacturing Engineering Journal, Vol. 168, No. 3, 2020
Taizhou Ouling CNC Equipment Co., Ltd.
As one of the most professional die sinker EDM manufacturers and suppliers in China, we’re featured by quality products and good price. Please rest assured to buy advanced die sinker EDM made in China here from our factory. Welcome to contact us for quotation.
Address: No.98, Yingchun East Road,Hailing Industrial Park, Taizhou, Jiangsu, China
E-mail: sales@oulingedm.com
WebSite: https://www.oulingedm.com/
